The aim of this section is to provide a series of useful guidelines on the most appropriate installation methods for installing mosaics, while we always recommend certified tile installers for best results, we have compiled these step-by-step instructions to guide you from start to finish.
1. CHECKING AND PREPARING THE MATERIALS & TOOLS
Before starting the work, check the boxes containing the VITRIS mosaic and make sure that there is sufficient material to complete the job. Make sure you have all the required tools to finish the work. See our tools section for our recommendations.
Every box is marked with the production batch number, color, order number and other details to be referenced should more of the same material be needed. Occasionally damages to the tile may occur during the shipping process. If the installer comes across overly chipped tiles, these should be removed and replaced using the Mosaic Health Kit sent with the mosaic.
The responsibility for correct installation rests with the end user. Always refer to the current local norms and standards.
! Don't hesitate to contact us if you require further assistance.
2. SKIMMING
As with any tile-setting work, the installation surface must be perfectly white, smooth and uniform for tiling (a substrate of a different color may adversely affect the look of the mosaic).
3. DRAWING THE STARTING LINE
Lay the sheets on the ground, measure the total size of three of them placed side by side in such a manner that the distance between one sheet and another is the same as that between one tile and another.
Use a spirit level or better, a laser level to trace the lines that will guide the correct position of the sheets on the surface with the same distance between them as from the three sheets mentioned above.
! The excessive use of pencils, (pens, marker pens, etc.) is to be avoided as lines drawn by the tiler before even starting to lay tiles, may remain visible even after grouting. This applies particularly where light colored grout is to be applied. We always recommend the use of a laser level; if a laser is not available, draw very light lines with pencil only
4. PREPARING THE TILE ADHESIVE
Prepare the R2T adhesive by mixing with water and use the notched trowel to spread it on the prepared surface only. Use the smooth edge of the trowel first, then the notched edge, drawing the teeth across and “combing” the adhesive to produce a uniformly ridged bed. The tiles can now be positioned.
The adhesive must always be soft and moist: apply with the trowel at an angle of 45° to the substrate and make sure to apply it evenly without leaving excess adhesive at the joints. When tiling walls, we recommend that the last "combing" is horizontal.
When applying the adhesive, take great care to ensure the best possible adhesion by “kneading” the adhesive on the substrate before the final “combing”.
! If tiling an area that is permanently subjected to the presence of water (e.g. tubs and swimming pools) it is best to waterproof the surface beforehand with a hydrophobic membrane and a protective sheath.
5. LAYING THE MOSAIC
The mosaic sheets are pre-assembled on mesh backing which is placed in DIRECT contact with the adhesive or taped with a transparent film on the face of the mosaic.
It is absolutely essential to follow to the letter the laying plan provided. Before staring we recommend a “dry run” in which you lay the sheets on the ground to get an overall view of the design. Make sure that the gap between one sheet and the next is the same as that between one tile and the next.
! The modular design should be treated like wallpaper. Any join between one module and the next should be positioned out of view (e.g. behind or above a door) to make it as invisible as possible.
! The distance between sheets must the same as that between one tile and the next so that when the job is complete, there are no obvious discrepancies in distance. The mosaic, regardless of format, does not need expansion joints. If they are joints on the substrate, they must be made allowance for and sealed with suitable flexible products.
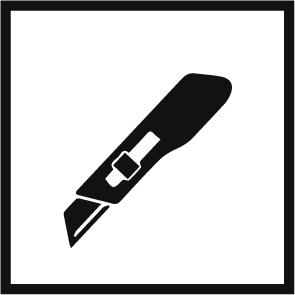
6. CORRECTING GAPS
During laying, before the adhesive has had time to harden, there is still time to adjust the gaps between one sheet and the next so as to provide uniform gaps. To do this, cut into the sheet with a cutter and increase or decrease the gap between sheets slightly using a small trowel.
! This is one of the most delicate stages of the application process but provides results well worth the effort.
7.GROUTING
For sheets that come on tape - Pull tape away in a diagonal motion off of the tile. Do not pull the polymer tape directly away from the tiles. Pull back along the surface of the tile, reducing the force pulling tiles away from the adhesive. Note that if you had to adjust any spacing of the tiles by cutting the polymer tape, there may be strips or squares of polymer tape pulling tiles away from the adhesive.
Before grouting, remove any powder and excess adhesive from the gaps and surfaces of the sheets. Prepare the RG grout using the instructions provided by the supplier.
Scoop the grout up with a trowel and place it on the rubber float. Begin grouting by moving the float diagonally to the sheet of tiles working from the bottom up in a skimming action until the gaps are completely filled. Take care not to leave excess grout on the tiles. Always use suitable protective gear.
! Expansion joints should be installed at all “changes in plane” of the mosaic and where the mosaic meets an adjoining surface, such as in a corner. Fill these spaces with a silicone caulking sealant to create expansion joints at these locations.
8. CLEANING
! Once the grout has been applied, there is a limited time span for starting cleaning before the grout begins to harden (ex. 45 minutes at 20° C - consult the R2T adhesive and RG grout technical sheets).
! Please follow the cleaning instructions provided by the grout manufacturer.
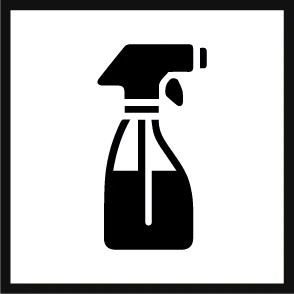
Start the cleaning procedure by wetting the surface to be cleaned with water spray. Use the a white felt scrubber (or similar) to wipe the tiles. Any excess grout will form an emulsion and the gaps will be left smooth. Wet a sponge (or similar) and use it to remove the emulsion. Repeat this procedure as often as necessary until the surface is completely clean and make sure that no grout residue remains on the tiles. The felt scrub and sponge can be used time and time again as long as they are thoroughly rinsed in clean water. Always use clean water for such tasks.
Lastly, to definitively make the mosaic shine, repeat all the cleaning procedures mentioned above and observe. Do not cover the surfaces for at least 4 days after grouting to allow the product to cure and harden evenly.
Your custom mosaic is durable and stain resistant. To maximize the life of your mosaic and retain its artistic integrity, please consider the following:
Use only a mild, pH-neutral detergent cleaner and damp sponge, mop or rag (or similar product) to clean your mosaic. Acid, alkaline, and solvent-base cleaners can damage and/or discolor the tiles and grout.
Do not let stains sit on your mosaic's surface for extended periods. Clean regularly.